
Reviving a root bound plant
It happens to all of us: you’ve come home from the nursery with the plants that are not only going to transform your garden, but your life, only to find that when you go to pot them, they are root bound. That’s why it was so hard to get them out of the pot in the first place, and now you have a mass of tightly wound brown roots staring at you, and you start to question all the financial decisions you definitely didn’t make on an impulse in the nursery.
Now, you won’t ever experience this with seedlings from The Corner Garden, but the reality is that we all (me included) buy plants from nurseries, and I have learnt even the fancy, expensive, and specialist nurseries will sell you root bound pots without you knowing. Unfortunately it is the reality of buying plants that have been growing in plastic pots for a long time.
Plants become root bound because the pot stays the same size, and yet the plant keeps growing. When the roots hit the hard surface of the pot, they will travel along the pot trying to find a gap to extend (roots like to grow outwards). This means they keep growing in a circle, forming a tight ball of roots. The large root system consumes most of the potting mix, which means there’s little food for the plant and the water travels straight through the pot rather than being absorbed by the soil and then the plant. All in all, it’s a pretty grim state of affairs.
We all want to take home the mature plant with all of the flowers looking stunning, but with these plants, their is a higher chance they will be root bound. Plant selection at the nursery aside (that’s a whole other post), here is my guide to reviving your root bound plants so you don’t throw all of your hard earned cash straight onto the compost pile without the chance for these plants to change your life like you know they could.
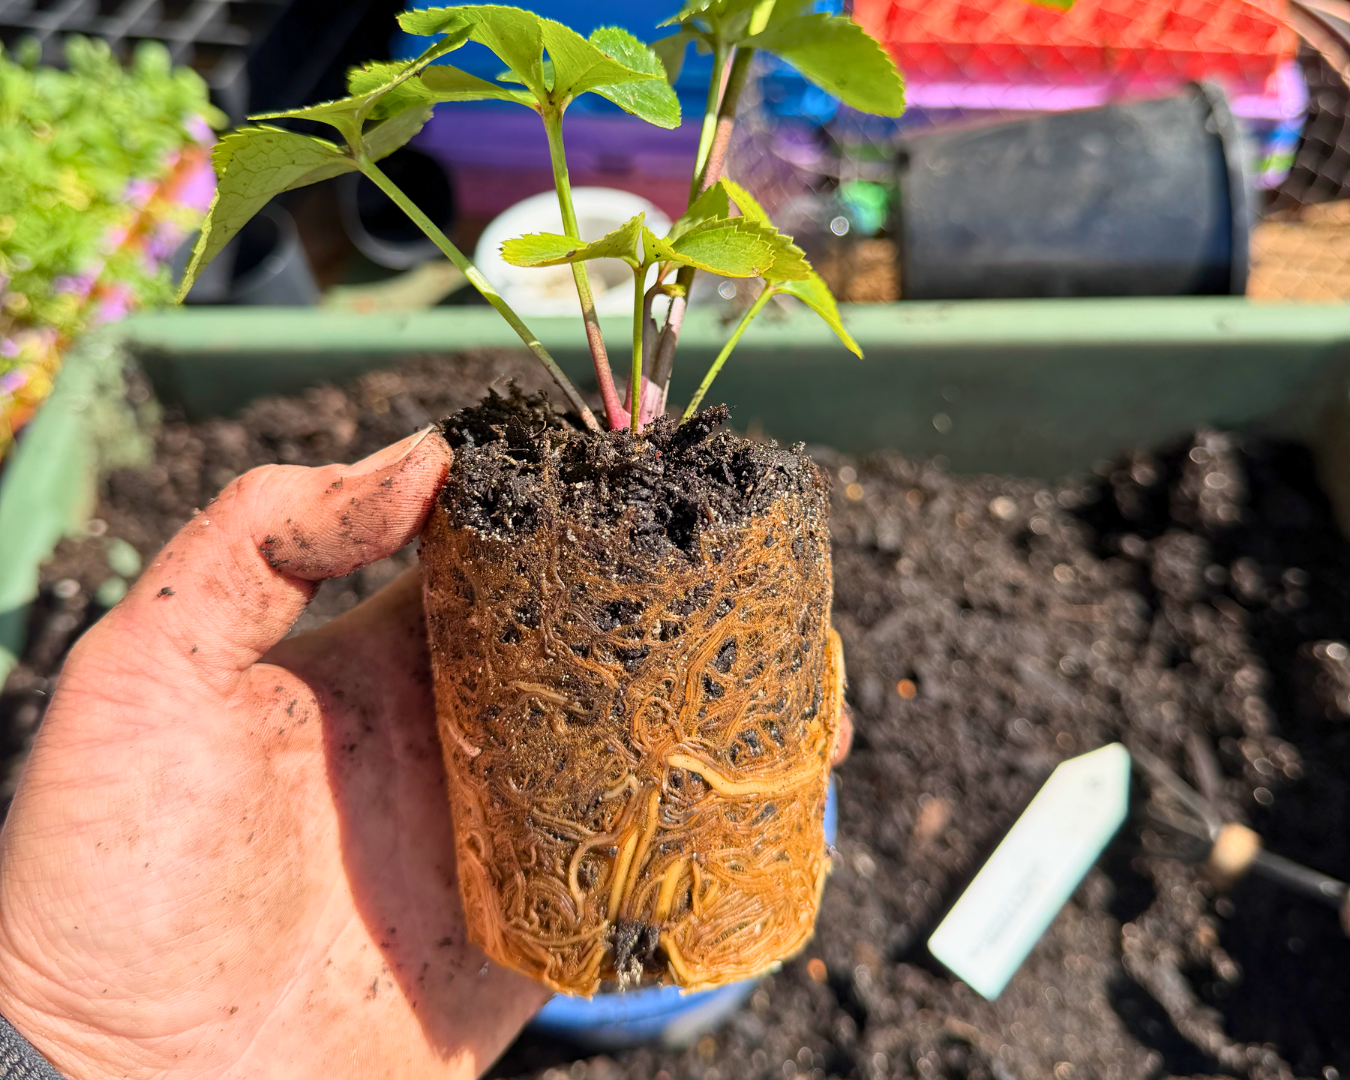
Prepare the plant
After you’ve vowed you’ll never go back to that nursery (you will), give the plant a thorough water and leave it for 24 hours so it has time to hydrate and the roots will be more pliable. If you don’t have the patience, that’s fine, just walk away for 10 minutes and come back.
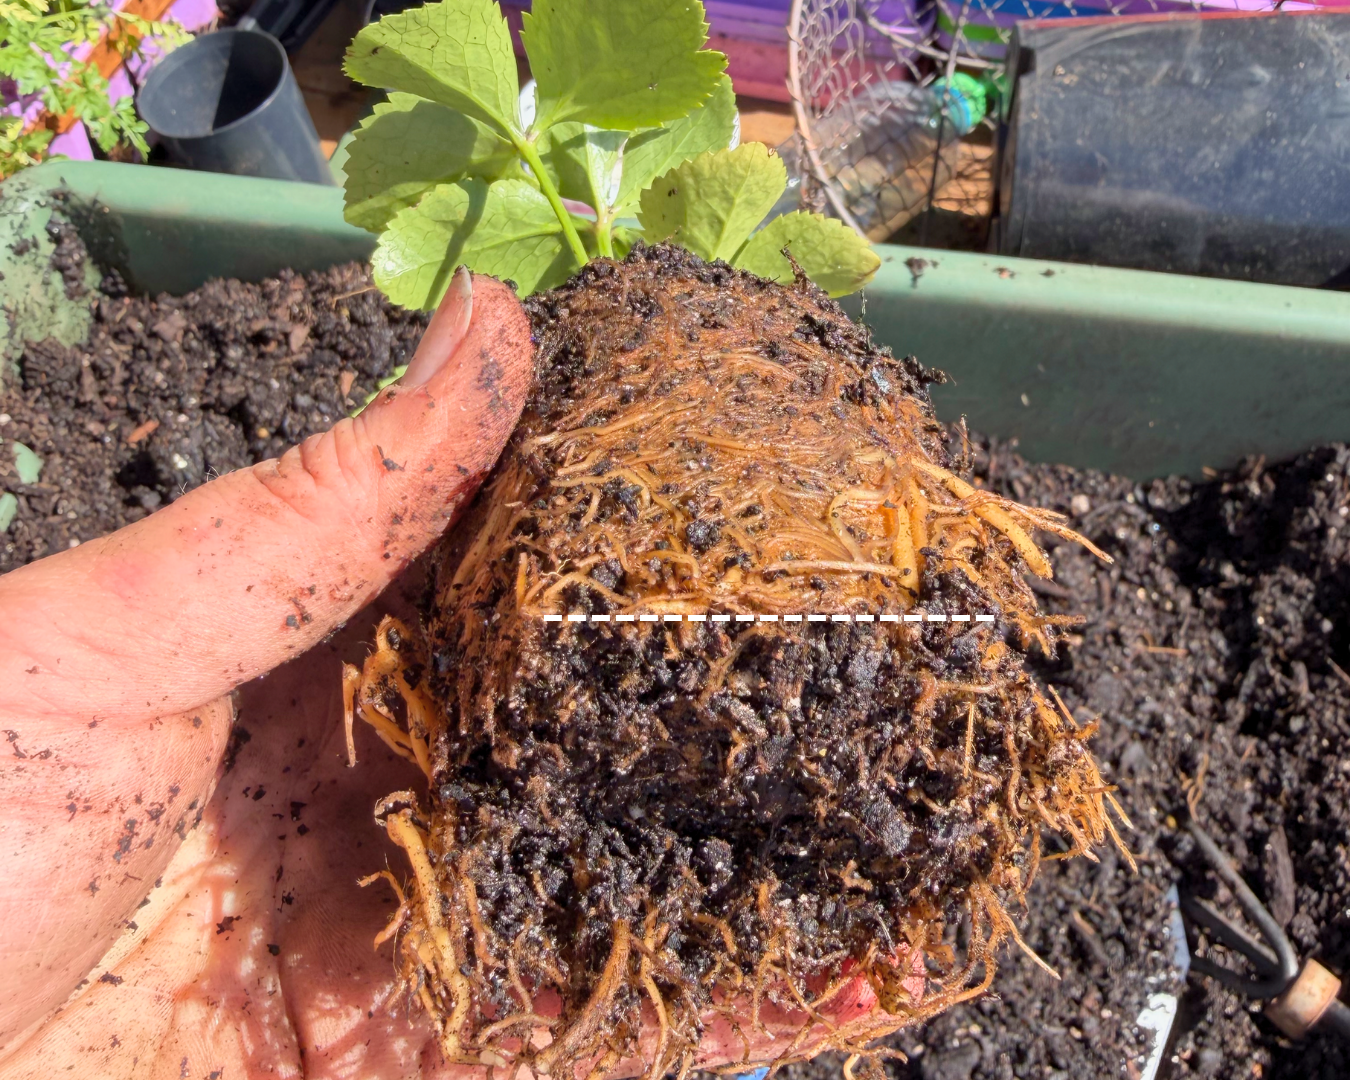
2. Cut off the ROOT PANCAKE
If your plant is as severely root bound as my specialty dahlia was in these images, cut the whole section of the circling roots off (the root pancake). They won’t re-direct themselves to grow outwards again. It’s ok, it will be fine.
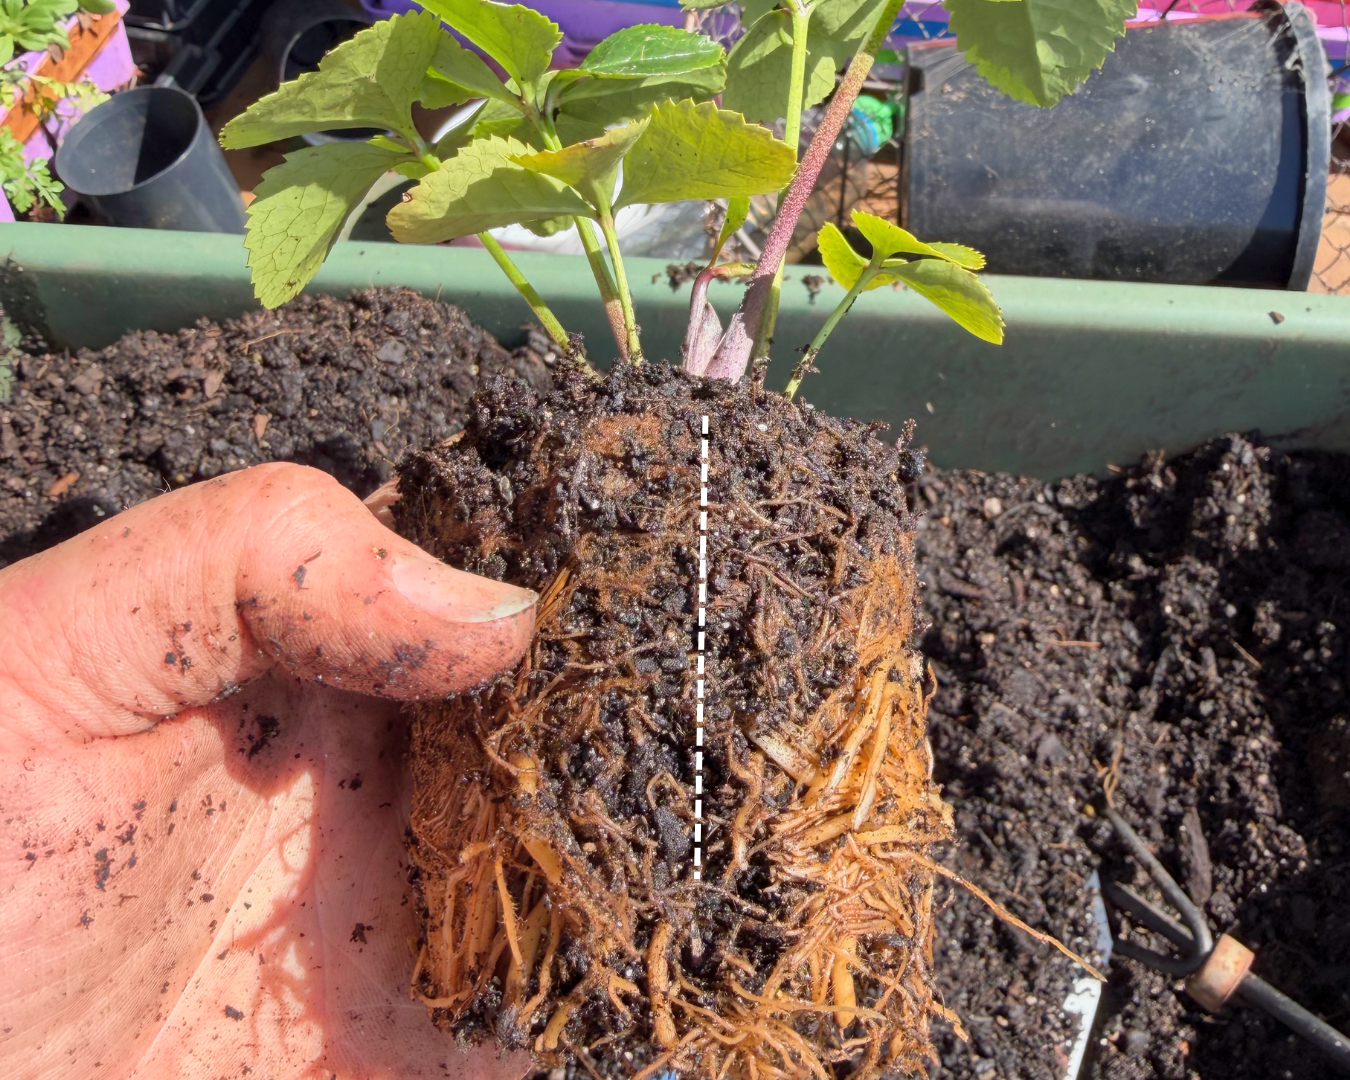
3. DISRUPT THE CIRCLE EFFECT
Along the side of the root mass, you’ll still see roots curling around the side. Scrape or cut downwards, so you’ve cut across the circling roots. Do this 3-4 times around the root edge of the root ball.
4. Repot and recover (you and the plant)
Repot your plant in a larger pot and with good quality potting mix (I go for the premium mixes at Bunnings or the Poynton’s Potting Mix if you’re in Melbourne), and give it a water with Seamungus or Seasol to help it recover from the shock of having it’s roots butchered. This will also help stimulate new, healthy growth outwards, not in circles.
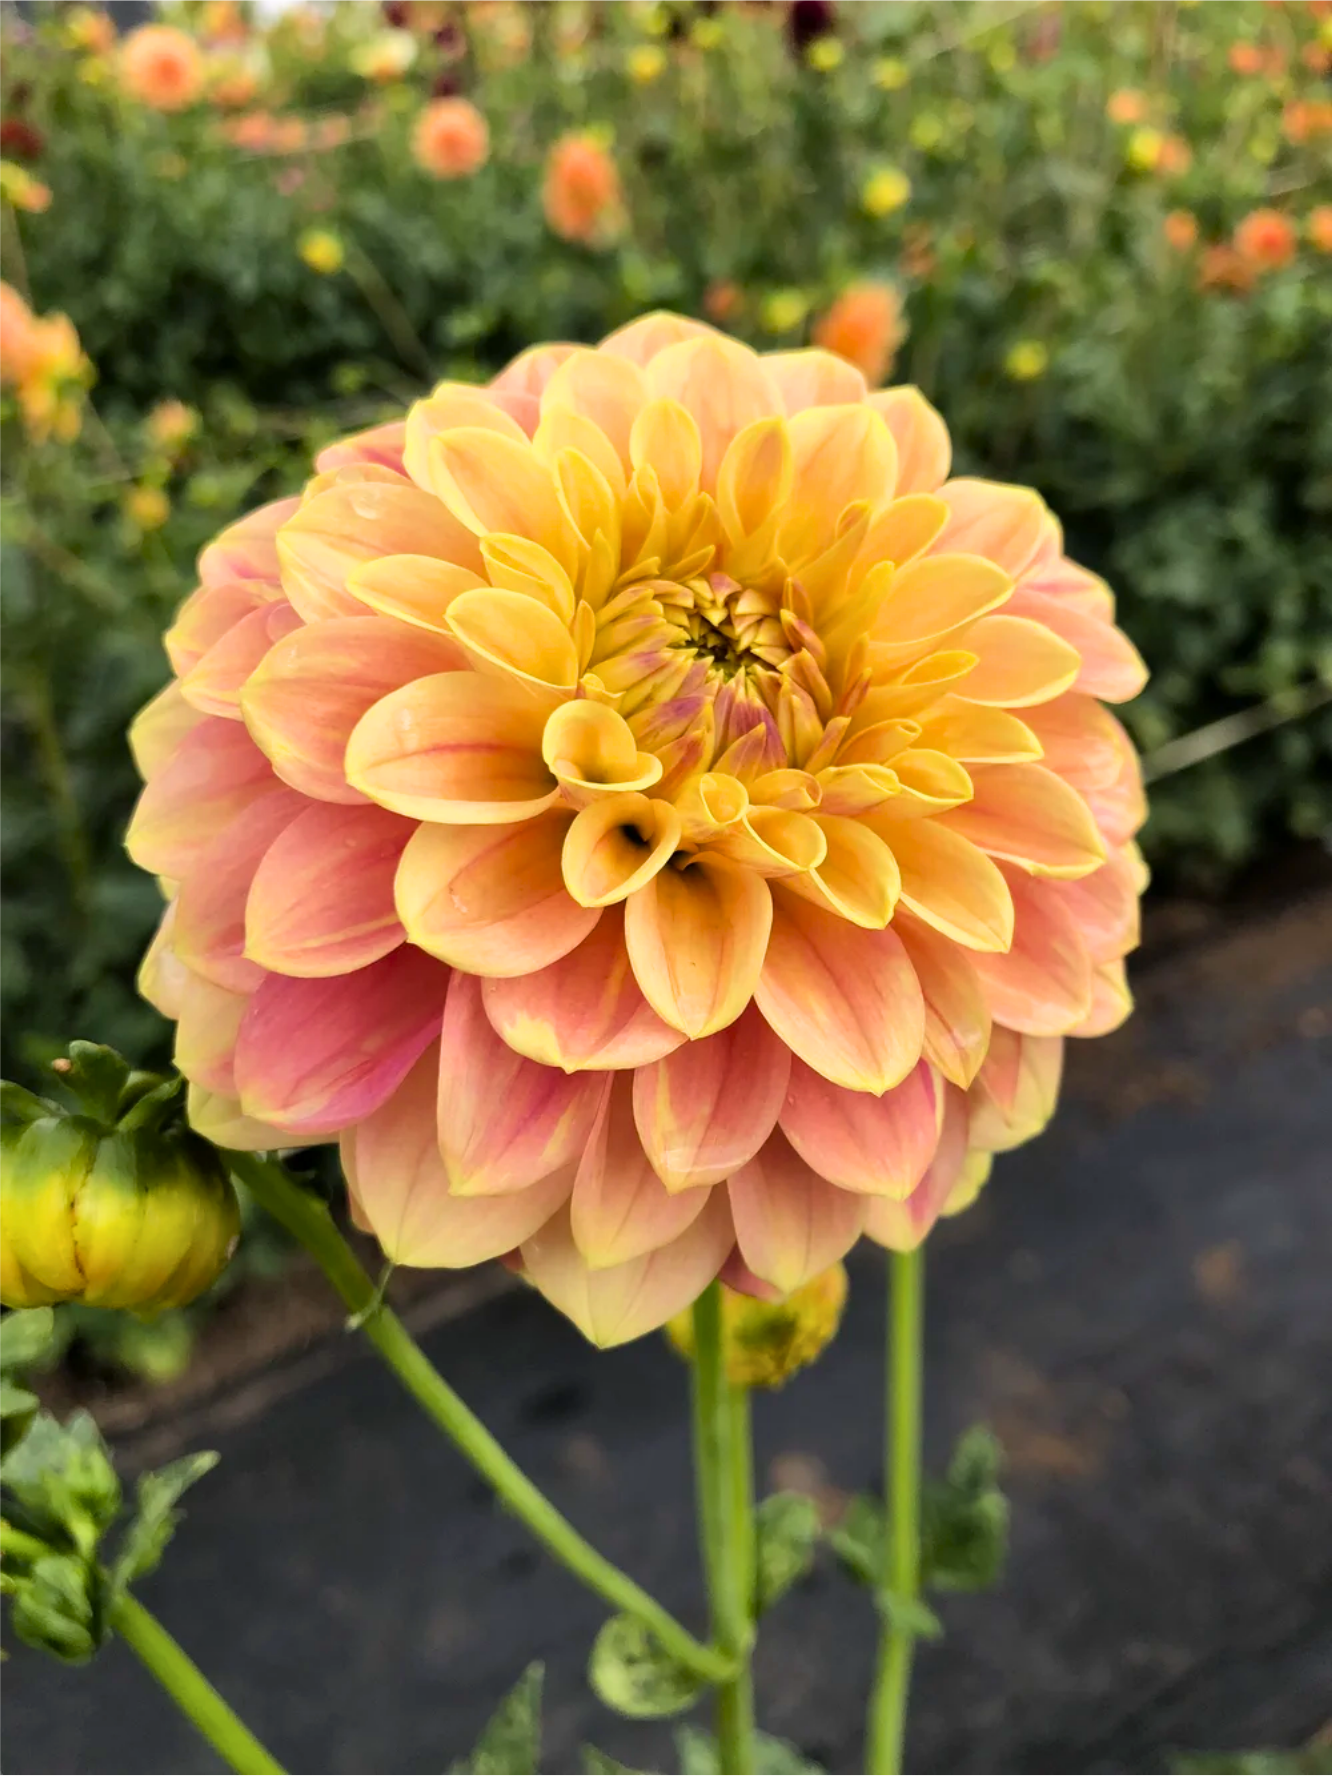
Now, for your recovery: go and look at photos of the mature, beautiful plant it will grow into that will absolutely, definitely, change your garden and life for the better. Here is a picture of the stunning Florelie Fruit Tingle Dahlia that I bought root bound and had to revive. Hopefully it will be in your Flowers from the Corner arrangements this summer!
Photo Credit: Willow Creek Farm Meadows (*not* the business who sold me the root bound plant!)